
How to Use Notion for Client Project Management (2026)
Most solopreneurs who use Notion fall into the same pattern: a page for meeting notes here, a database of tasks there, a client list that never gets updated, and a “Projects” database that looked great the day it was built and has been quietly ignored ever since. The problem isn’t Notion — it’s that Notion’s flexibility makes it easy to build something that looks like a system without the relational structure that makes it actually function like one. A real client project management system surfaces the right information in the right context automatically: when you open a client page, you see their active projects. When you open a project page, you see every outstanding task. When a client wants a status update, there’s a page you can share that shows them exactly what they need without exposing your entire workspace. This guide builds that system from scratch.
The Architecture: Three Databases, One System
The foundation of a Notion client project management system is three interconnected databases. Everything else — views, portals, automations, dashboards — is built on top of this structure. Get the architecture right and the rest follows naturally.
Database 1: Clients
Your Clients database is the master record for every person or company you work with. Each client record becomes a hub page that surfaces all related projects and deliverables through linked views. Essential properties:
- Name (title)
- Status (select) — Active, Onboarding, Paused, Past
- Contact Email (email)
- Industry (select)
- Monthly Value (number) — for revenue tracking
- Projects (relation to Projects database — backlinked)
- Start Date (date)
- Notes (text) — one-line summary of relationship context
Database 2: Projects
Each project record represents a discrete engagement — a retainer month, a specific deliverable package, a one-time project. Properties:
- Project Name (title)
- Client (relation to Clients — this is what connects them)
- Status (select) — Discovery, In Progress, Review, Complete, On Hold
- Start Date / Due Date (date range)
- Budget (number)
- Tasks (relation to Tasks database — backlinked)
- Deliverables (text) — brief description of what’s being produced
- Priority (select) — High, Medium, Low
Database 3: Tasks
Tasks are the atomic unit of work. Each task belongs to a project, which belongs to a client. Properties:
- Task Name (title)
- Project (relation to Projects)
- Status (select) — Not Started, In Progress, Blocked, Done
- Due Date (date)
- Priority (select)
- Assignee (person — relevant if you have contractors)
- Client (rollup from Project → Client) — lets you filter all tasks by client without manual tagging
The Client rollup on Tasks is the key that most people miss: by rolling up the client name through the project relation, you can create a Tasks view filtered by any client without duplicating data. This is what makes the client portal work cleanly.
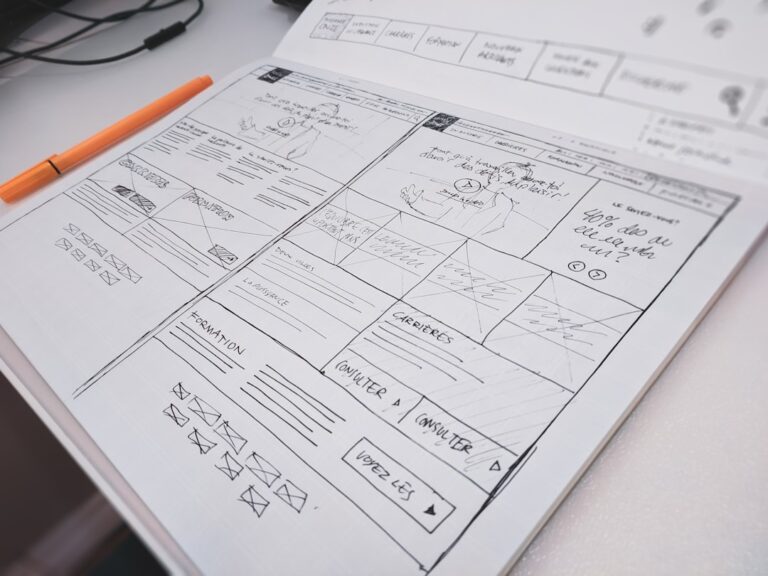
Setting Up the Views That Make It Functional
Databases without views are just tables. The views are where Notion’s project management capability actually lives — and building the right views is what makes this feel like a real system rather than a structured spreadsheet.
Project Pipeline View (Kanban by Status)
On your Projects database, add a Board view grouped by Status. This gives you an instant visual pipeline — Discovery → In Progress → Review → Complete — across all active client work. Filter this view to show only projects where Status ≠ Complete to keep the board focused on active work.
Set this board as the default view on your main Projects database. It’s the first thing you see when you navigate to your project management hub and it gives you full pipeline visibility in seconds.
Today’s Tasks View (Filtered by Due Date)
On your Tasks database, add a filtered view called “Today”: filter by Due Date = Today, then add a secondary sort by Priority (High first). This view becomes your daily work dashboard — you open it in the morning and it shows exactly what needs to happen today across all clients and projects without any manual compilation.
Add a second view: “This Week” — filter by Due Date is within the next 7 days. These two views replace any separate to-do app you might be using for client work.
Client Hub Pages
On each individual Client record page, embed two linked database views:
- A filtered Projects view showing only projects where Client = this client
- A filtered Tasks view showing only tasks where Client rollup = this client AND Status ≠ Done
The result: every client page is automatically a live hub for that client’s active work. You never navigate to a client and wonder “where is this project?” — it surfaces immediately, along with every outstanding task across all their active projects.
Building the Client-Facing Portal
The client portal is the feature that most solopreneurs don’t realize Notion supports natively. You can share a specific page — with specific linked views — with a client via a public or password-protected Notion link, without giving them access to your full workspace.
Here’s how to build it:
- Create a new page inside each client’s record called “[Client Name] — Project Portal”
- Add a brief introductory paragraph: “Here’s your live project status. This page updates automatically as work progresses.”
- Embed a filtered Projects view showing only this client’s projects with these visible properties: Project Name, Status, Due Date, Deliverables
- Embed a filtered Tasks view showing only active tasks for this client — hide internal properties like Priority and Assignee
- Add a “Recent Updates” section — a simple toggle list or dated notes where you post brief weekly updates manually
To share: click “Share” on the portal page, enable “Share to web,” and optionally add a password. Send the client the link. They see a clean, real-time project status page that updates as you work — no login required, no access to anything else in your workspace.
This single feature has a significant impact on client relationships. Clients who have a link to their portal stop sending “what’s the status?” emails. The portal answers that question continuously without any work on your end beyond doing the actual work and updating task statuses.
For a deeper look at building full client dashboards in Notion, our How to Build a Client Dashboard in Notion (Free) guide covers additional views and components worth adding once the core portal structure is working.
Notion Automations for Status Tracking
Notion’s native automation builder (available on the free plan with limits, full access on Plus and above) handles several repetitive project management tasks without requiring a third-party tool.
The automations worth setting up immediately:
- Project status → notification: When Project Status changes to “Review,” send an email or Notion notification to yourself as a reminder to do the review pass. This removes the cognitive overhead of manually tracking which projects are waiting for review.
- Task due date approaching → notification: When Task Due Date is 2 days away AND Status ≠ Done, trigger a reminder. This catches tasks that have slipped without requiring daily review of the full task list.
- Project marked Complete → archive tasks: When Project Status changes to “Complete,” automatically update all related Tasks to Status = Done. This keeps your “Today” and “This Week” task views clean without manual bulk-updating.
For more complex automations — automatically creating Notion project records when a client signs a contract in PandaDoc, or syncing project status updates to Slack — Zapier and Make.com handle these cross-app workflows cleanly. Our How to Connect Notion and Zapier (Automation Guide) covers the authentication setup and the most reliable Notion-specific trigger and action combinations for client project workflows.
Notion vs. Dedicated Project Management Tools
The honest comparison every solopreneur needs to make before committing to Notion for project management:
| Feature | Notion | ClickUp | Monday.com | Airtable |
|---|---|---|---|---|
| Setup time | 2–3 hrs (build from scratch) | 1–2 hrs (templates) | 1 hr (guided) | 2–3 hrs (build from scratch) |
| Documentation + PM in one | Yes — native | Partial (Docs feature) | No | No |
| Client portal | Yes — shared pages | Yes (Client view) | Yes (Guest access) | Yes (shared views) |
| Free plan usability | Excellent | Good | Trial only | Limited (1,000 records) |
| Native time tracking | No (manual number field) | Yes | Yes (add-on) | No |
| Automation depth | Basic (native); strong via Zapier | Strong native | Strong native | Strong native |
| Paid starting price | $12/user/mo | $7/user/mo | $9/seat/mo | $20/user/mo |
Notion wins for solopreneurs who want their client project management and their business documentation in the same workspace. If you need time tracking, stronger native automations, or a more structured team workflow, ClickUp’s templates offer a faster path to a functional system. Our Best ClickUp Templates for Freelancers and Agencies (2026) guide covers that alternative stack if you decide Notion’s flexibility isn’t the right tradeoff for your workflow.
Integrating Notion With Your Client Onboarding Flow
The project management system becomes significantly more powerful when new projects flow into it automatically rather than requiring manual record creation for every new engagement.
The trigger: a signed contract or completed intake form. When this event fires, an automation should:
- Create a new Project record in Notion with the client name, project type, and start date populated from the intake form
- Create the default task set for that project type (discovery call, kickoff doc, first deliverable draft, review, final delivery) — either via a Notion template button or via Zapier creating records programmatically
- Generate the client portal page and send the client the link
- Move the client record status from “Onboarding” to “Active”
This full onboarding automation can be built entirely in Zapier (connecting your contract tool to Notion) or in Make.com for more complex multi-step logic. For the complete onboarding automation workflow design, our How to Automate Client Onboarding (Step-by-Step) guide covers the end-to-end setup — the Notion project management system described in this article is the destination that automation feeds into.
- The foundation of a Notion client project management system is three linked databases — Clients, Projects, and Tasks — connected by relations that surface information in context automatically rather than requiring manual navigation.
- The Client rollup on Tasks (rolling up the client name through the project relation) is the single most important property for filtering work by client without data duplication — don’t skip it.
- Notion’s native client portal feature (shared pages with filtered linked views) eliminates “what’s the status?” client emails and builds credibility with clients at zero additional cost.
- Notion’s native automations handle basic status tracking well; for cross-app workflows (contract signed → project created), Zapier or Make.com fill the gap reliably.
- Commit to the system fully for 30 days before evaluating — the linked database approach requires a brief adjustment period but produces significantly more operational clarity than fragmented single-purpose tools.
Frequently Asked Questions
Is Notion good enough for client project management without paid tools?
Yes — Notion’s free plan covers unlimited pages, databases, relations, linked views, and basic automations, which is everything required to build the three-database system described in this guide. The free plan does limit automation runs (limited number per month) and blocks certain admin features, but for a solopreneur managing 5–15 active client projects, the free plan is genuinely functional. The Plus plan at $12/month adds unlimited automation runs, version history, and unlimited guests — worth upgrading to once the system is built and validated.
How is this different from just using a spreadsheet to track client projects?
The critical difference is linked records. In a spreadsheet, your client list, project list, and task list are separate sheets with no structural connection — if you want to see all tasks for a specific client, you have to manually filter or cross-reference multiple sheets. In Notion’s relational database structure, the connection is native: opening a client record automatically surfaces all their projects, and opening a project automatically surfaces all its tasks. This means information finds you rather than requiring you to search for it, which is the difference between a system you use continuously and a spreadsheet you consult occasionally.
Can I use this Notion system if I have a small team, not just solo?
Yes — the three-database architecture scales to small teams well. Add an Assignee property to the Tasks database (Notion’s person property), and each team member can filter the main Tasks view to show only tasks assigned to them. Add a filtered “My Tasks Today” view to the homepage for each team member. The client portal works identically for team-based work — the client sees the same filtered view regardless of how many people are contributing to the project. The main upgrade consideration: Notion’s free plan limits guests, so if you’re sharing portal pages with multiple clients simultaneously, the Plus plan’s unlimited guest feature becomes necessary.
What’s the best way to handle recurring projects in this system?
For retainer clients with recurring monthly deliverables, use Notion’s template button feature: create a Project template that pre-populates all standard tasks for a retainer month (with relative due dates like “+7 days,” “+14 days” from project start), then click the template button at the start of each new month to generate a complete project with all default tasks in under 10 seconds. This is faster than duplicating a previous month’s project manually and cleaner than trying to reuse the same project record across multiple months. Each month becomes its own discrete project record, which makes historical review and revenue tracking significantly cleaner.
How do I migrate existing client data into this Notion system?
The fastest migration path: start with your active clients only, not your entire client history. Create client records for every currently active engagement, create the corresponding project records, and add the immediate tasks for each active project. Don’t try to recreate historical data — it creates migration overhead without operational value. Historical project data (old deliverables, past invoices, completed work) can live in a separate “Archive” database or simply stay in its current location. The goal is a functional system for active work today, not a comprehensive historical record. Build the active system, use it for 60 days, and then decide whether historical data migration is worth the time investment.


6 Comments