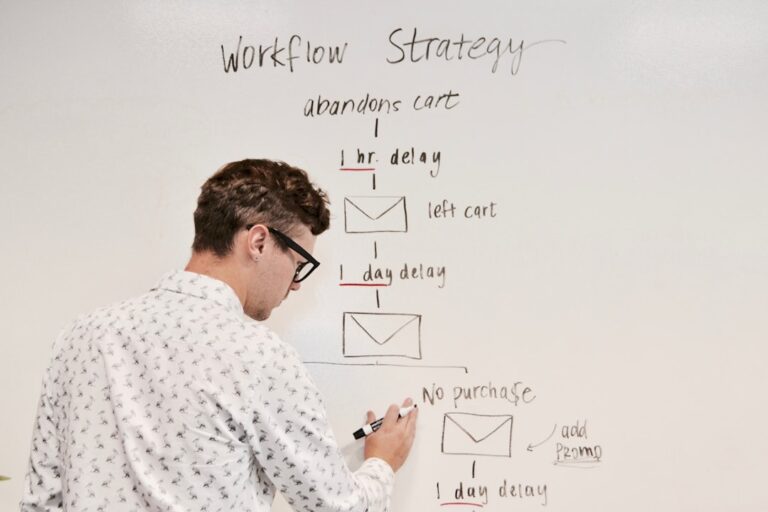
Zapier + Google Sheets: Automate Business Reports
Every solopreneur has a reporting spreadsheet they hate. It’s the one you open on Sunday evening and spend ninety minutes manually copying numbers from five different tabs across three different tools — revenue from Stripe, new leads from your form, bookings from Calendly, tasks completed from your project management tool. You built it with good intentions. You update it inconsistently. And half the time you close it without finishing because the process is so tedious you’d rather just not know. Zapier’s Google Sheets integration fixes this by pulling data into your spreadsheet automatically the moment it’s generated — so the numbers are already there when you want to look at them, with no copying required. This guide walks through exactly how to build that system.
How Zapier and Google Sheets Work Together
Zapier connects Google Sheets to 6,000+ apps via a trigger-action model. When a defined event happens in another tool (the trigger), Zapier automatically performs an action in Google Sheets — adding a row, updating a cell, looking up a value, or creating a new spreadsheet.
The Google Sheets actions available in Zapier include:
- Create Spreadsheet Row — adds a new row to a specified sheet with data from the triggering event
- Update Spreadsheet Row — finds an existing row and updates one or more cells
- Create or Update Spreadsheet Row — checks if a matching row exists; creates it if not, updates it if so
- Look Up Spreadsheet Row — finds a row matching a search value; useful as a step before updating
- Create Spreadsheet — generates a new Google Sheets file (useful for auto-creating monthly report sheets)
- Format Row — applies formatting to newly created rows (bold, color, etc.)
The triggers available from Google Sheets are equally useful — you can trigger a Zap when a new row is added to a sheet, which creates a two-way system where your spreadsheet can both receive data automatically and send data to other tools.
Setting Up Your Master Reporting Sheet
Before building any Zaps, spend twenty minutes designing your reporting sheet correctly. The structure you create now determines how clean and useful your automated reports will be.
The Header Row Is Everything
Zapier maps data to columns by header name. Create your header row first with clear, specific column names:
- Date
- Source (which Zap or tool sent this data)
- Type (revenue, lead, task, booking — whatever categories matter to you)
- Amount or Value
- Client or Contact Name
- Status
- Notes
Keep headers simple and avoid spaces in column names where possible — some Zap configurations handle spaces inconsistently. “ClientName” is more reliable than “Client Name.”
Use Separate Tabs for Different Data Streams
Rather than sending all your data to one tab, create separate tabs for each data type — Revenue, Leads, Tasks, Bookings — and use a summary tab with formulas that pull from all four. This keeps your Zaps simple (each one writes to one tab), keeps your data clean, and makes the summary view easy to build and maintain.
The 5 Zapier + Google Sheets Automations Every Solopreneur Should Build
1. New Stripe Payment → Add Revenue Row
This is the highest-value automation on this list. Every time a payment clears in Stripe, Zapier automatically adds a row to your Revenue tab with the amount, customer name, product or invoice description, and date.
Setup:
- Trigger: Zapier → Stripe → “New Payment”
- Action: Google Sheets → “Create Spreadsheet Row”
- Map: Amount, Customer Name, Description, Date to your Revenue tab columns
Once this Zap is running, your revenue report is always current — no end-of-month catch-up, no manual tallying. Your summary tab formula does the adding automatically.
2. New Calendly Booking → Add Booking Row
If you use Calendly for client scheduling, every new booking should hit your reporting sheet automatically. This lets you track booking volume, see which meeting types are most common, and monitor how many consultations convert to paid work over time.
Setup:
- Trigger: Zapier → Calendly → “Invitee Created”
- Action: Google Sheets → “Create Spreadsheet Row”
- Map: Invitee Name, Email, Event Type, Start Time to your Bookings tab
Add a follow-up step: Add a second action in the same Zap to send yourself a Slack message or email notification when a high-value meeting type (like a “Discovery Call”) is booked. Multi-step Zaps — available on Zapier’s Starter plan and above — let you chain multiple actions from a single trigger.
3. New Typeform or JotForm Submission → Add Lead Row
Every contact form or lead capture submission should appear in your Leads tab automatically, with the submitter’s name, email, what they’re interested in, and the submission date. Combined with a formula that counts submissions per week, this gives you a rolling lead volume metric without any manual counting.
Setup:
- Trigger: Zapier → Typeform (or JotForm) → “New Entry”
- Action: Google Sheets → “Create Spreadsheet Row”
- Map: Name, Email, relevant question answers, submission date to Leads tab
4. Completed Task in ClickUp or Airtable → Add Completion Row
Tracking task completion rates is one of the most underutilized productivity metrics for solopreneurs. When you can see that you completed 23 tasks last week versus 11 the week before, you have actual data about your capacity and output — not a vague sense of whether you were “productive.”
Setup (ClickUp version):
- Trigger: Zapier → ClickUp → “Task Completed”
- Filter: Add a Zapier Filter step — only continue if Task List matches your client work list (not every personal to-do)
- Action: Google Sheets → “Create Spreadsheet Row”
- Map: Task Name, List, Completion Date, Assignee to Tasks tab
Setup (Airtable version):
- Trigger: Zapier → Airtable → “New Record” (with a filter for your Status field equaling “Complete”)
- Action: Google Sheets → “Create Spreadsheet Row”
5. Weekly Google Sheets Digest → Email Report to Yourself
This is the automation that closes the loop. Instead of opening your spreadsheet to check your numbers, have Zapier pull a weekly summary and email it to you every Monday morning.
Setup:
- Trigger: Zapier → Schedule → “Every Week” (Monday, 8:00 AM)
- Action: Google Sheets → “Look Up Spreadsheet Row” — find this week’s summary totals from your summary tab
- Action: Gmail → “Send Email” — formatted with the key metrics from step 2
This requires a multi-step Zap (Zapier Starter plan or above) but the result is a Monday morning digest that arrives in your inbox without you doing anything.
Building a Weekly Business Dashboard in Google Sheets
Once your data-entry Zaps are running, the real power is in the summary dashboard you build on top of that automated data. Here’s a simple structure:
Summary Tab Formula Setup
Use SUMIF and COUNTIF formulas to aggregate data from your source tabs:
- This Month’s Revenue —
=SUMIF(Revenue!A:A, ">="&DATE(YEAR(TODAY()),MONTH(TODAY()),1), Revenue!D:D) - Leads This Week —
=COUNTIFS(Leads!A:A, ">="&TODAY()-7, Leads!A:A, "<="&TODAY()) - Tasks Completed This Week —
=COUNTIFS(Tasks!D:D, ">="&TODAY()-7) - Bookings This Month —
=COUNTIFS(Bookings!D:D, ">="&DATE(YEAR(TODAY()),MONTH(TODAY()),1))
These formulas update automatically as Zapier adds new rows — your dashboard is always current without a single manual calculation.
Zapier vs. Make.com for Google Sheets Automation
Zapier isn't the only option for connecting Google Sheets to your business tools. Make.com (formerly Integromat) offers similar Google Sheets integration with different pricing and more visual workflow building. Here's how they compare for this specific use case:
| Feature | Zapier | Make.com |
|---|---|---|
| Free plan | 100 tasks/mo, single-step only | 1,000 ops/mo, multi-step included |
| Starter paid plan | $29.99/mo (750 tasks) | $9/mo (10,000 ops) |
| Setup difficulty | Easiest — linear, guided | Moderate — visual canvas |
| Google Sheets actions | ✅ Full range | ✅ Full range |
| Multi-step Zaps/Scenarios | Starter plan required | ✅ Free plan |
| App library | 6,000+ apps | 1,500+ apps |
| Best for | Beginners, broad app coverage | Budget-conscious, complex flows |
If you're just getting started with automation, Zapier's guided setup makes building your first Google Sheets Zap significantly faster. If you've already explored Make.com and want to see how client reporting automation works with that tool specifically, the Make.com client reporting guide walks through the equivalent setup on that platform. And if you want a side-by-side breakdown of both tools to decide which fits your overall stack, the Make.com vs Zapier comparison for small business covers the decision in full.
Extending the System: Beyond Basic Row Logging
Once your core data-entry Zaps are running cleanly, several extensions are worth adding:
Auto-Format New Rows
Use Zapier's "Format Row" action in Google Sheets to automatically bold the latest entry, color-code rows by type, or apply currency formatting to revenue rows. This keeps your sheet readable without manual formatting.
Trigger Alerts When Thresholds Are Hit
Build a Zap that triggers from Google Sheets: when a value in a specific cell (like your monthly revenue total) exceeds or drops below a target, send yourself an email or Slack notification. This turns your spreadsheet into a passive monitoring system — you only hear from it when something worth knowing happens.
Auto-Share Weekly Reports
For solopreneurs who share reports with clients, add a Zapier step that exports the relevant Google Sheet as a PDF and emails it to the client automatically every week. Combined with a fully automated client reporting workflow, this eliminates one of the most time-consuming weekly tasks in service businesses entirely.
Connect to Other Reporting Tools
Google Sheets doesn't have to be your final destination. You can use Zapier to send your Sheet data to Airtable for more powerful filtering, to a Monday.com board for visual project tracking, or to a Notion database for combined documentation and data. The reporting stack you build depends on which tools you're already using — Google Sheets is a universal middle layer that plays well with everything.
For a broader look at how Zapier fits into a complete solopreneur automation stack, the best Zapier automations for solopreneurs covers the full set of workflows worth building beyond reporting.
- Zapier's Google Sheets integration automatically adds rows, updates cells, and populates reports whenever a defined event happens in another tool — eliminating manual data entry from your reporting workflow entirely.
- The five highest-value Zaps for solopreneurs are: Stripe payments → revenue tab, Calendly bookings → bookings tab, form submissions → leads tab, completed tasks → tasks tab, and a weekly scheduled digest sent to your inbox.
- Structure your Google Sheet with separate tabs per data type and a summary dashboard tab with SUMIF/COUNTIF formulas — the formulas update automatically as Zapier adds rows, giving you a live dashboard with no maintenance.
- Zapier's free plan (100 tasks/month, single-step only) handles basic row-creation Zaps. Multi-step Zaps and Filter steps require the Starter plan at $29.99/month — calculate your expected monthly task volume before choosing a tier.
- Make.com is a credible alternative to Zapier for Google Sheets automation, especially on a budget — its free plan includes multi-step scenarios and 1,000 operations/month, which covers most small business reporting workflows at zero cost.
Frequently Asked Questions
Does Zapier work with Google Sheets on a free Google account?
Yes — Zapier's Google Sheets integration works with any Google account, including free personal Gmail accounts. You'll need to authorize Zapier to access your Google Drive during the Zap setup, which grants permission to read and write to your Sheets. The authorization is account-level, so once connected, all Zaps using Google Sheets actions can write to any spreadsheet in that account.
How many rows can Zapier add to Google Sheets?
There's no row limit imposed by Zapier — it will add rows as long as your Zap has available tasks in your monthly plan. The Google Sheets row limit is 10 million cells per spreadsheet (which for a sheet with 10 columns is about 1 million rows) — effectively unlimited for any small business reporting use case. If you're running high-volume reporting (hundreds of rows per day), split your data across multiple sheets or tabs to keep things performant.
Can Zapier update an existing row in Google Sheets instead of creating a new one?
Yes — use the "Update Spreadsheet Row" action instead of "Create Spreadsheet Row." This action searches for a row matching a value you specify (like a client ID or email address) and updates specific columns in that row. For use cases like updating a client's status when a project is completed, or updating an invoice amount when a payment is received, the update action is more appropriate than always creating new rows.
Will my Google Sheets report work if Zapier is down?
Zapier has very high uptime (99.9%+ historically), but brief outages do occur. When Zapier is down, Zaps queue and run when the service recovers — you won't permanently lose data, but there may be a delay. For business-critical reporting, this is an acceptable trade-off versus manual entry. For truly mission-critical data, always maintain your primary source data in the originating tool (Stripe, Calendly, etc.) and treat your Google Sheets report as a derived view, not the canonical record.
Can I use this system if I'm not a Zapier subscriber yet?
Yes — Zapier's free plan supports the core row-creation Zaps described in this guide (Stripe → Sheets, Calendly → Sheets, Typeform → Sheets) as single-step Zaps within the 100 tasks/month limit. The multi-step Zaps (like the weekly digest email) require a paid plan. Start with the free plan to build and test your first two or three reporting Zaps, verify they're running correctly, and upgrade to Starter ($29.99/month) when you're ready to add multi-step flows and higher task volume. If you want to explore tools that offer more free-tier automation power, the best Zapier alternatives for small business covers options that include multi-step flows on free plans.


2 Comments