How to Build a Free Client Portal for Freelancers
If you’re managing client projects through a combination of email threads, Google Drive folders, Slack messages, and occasional Zoom calls, you’re not alone — and you’re also spending significantly more time on client communication overhead than you need to. The pattern is predictable: a client emails asking for the latest version of a deliverable you sent two weeks ago. Another asks where the project stands. A third sends feedback on a doc they were supposed to review, but in a reply to a completely different thread. Each of these takes only a few minutes to handle, but they add up to hours per week of context-switching and administrative work that has nothing to do with the actual service you’re delivering. A client portal eliminates most of this by giving clients one place to find everything — and it doesn’t require a paid tool, a developer, or more than a few hours of your time to build.
What a Freelancer Client Portal Actually Needs
Before building anything, it’s worth being clear about what a functional client portal needs to contain — because many freelancers over-engineer this, building something elaborate that clients find confusing and never use.
A client portal that actually gets used has five elements:
- Project status at a glance — where things stand right now, in plain language. Not a Gantt chart. One sentence or a simple stage label (Discovery → In Progress → In Review → Complete).
- Deliverables, clearly organized — files and links for everything you’ve produced, organized by version or milestone. No hunting through email attachments.
- What the client needs to do — a clear, visible list of any pending client actions: feedback needed, approval required, information outstanding. This is the most important element for reducing “just checking in” follow-up emails.
- A way to leave feedback — a designated place for client comments that isn’t an email thread. This keeps feedback consolidated and findable.
- Key project information — timeline, contacts, scope summary, invoice links. Everything a client might need to reference without emailing you.
Notice what’s not on this list: a messaging system, a task management board for internal work, or a full project management dashboard. The client portal is for clients — it should show only what they need, cleanly presented, without exposing your internal workflow.
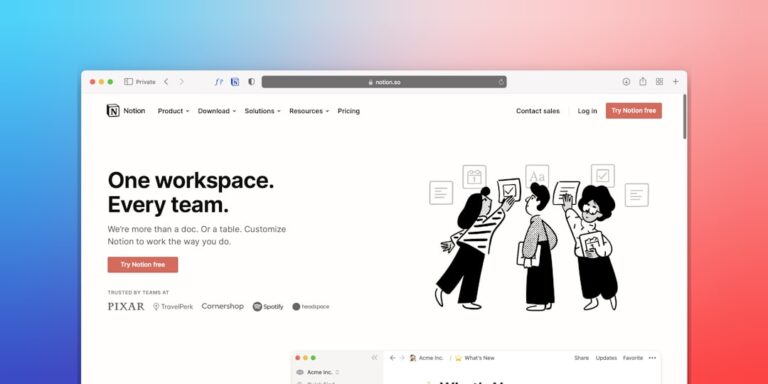
Option 1: Build a Notion Client Portal (Free Tier)
Notion is the most popular free client portal tool for freelancers because the result looks professional, requires no client account, and takes less than two hours to build for the first client — after which you duplicate the template for every subsequent client in minutes.
The Structure That Works
Create a new Notion page for each client. Structure it with these sections:
- Project Status — a simple callout block at the top showing current stage and one-sentence status update. Update this whenever something significant changes.
- Your Action Items — a checklist of what the client currently needs to do. Keep this at the top, above deliverables. When clients see it immediately, they act on it faster.
- Deliverables — a toggle list organized by milestone or deliverable type. Each toggle opens to show the file link, version, and delivery date. Clients find what they need without asking.
- Feedback — a section with a prompt asking clients to leave comments inline. Notion’s comment feature lets clients comment on specific blocks, keeping feedback attached to the relevant content.
- Project Overview — timeline, scope summary, key contacts, and invoice link. Collapsed by default so it doesn’t clutter the main view.
Sharing Without a Client Login
Go to Share → Publish to web. This generates a public URL that anyone can access without a Notion account. Set permissions to “Can comment” if you want clients to leave feedback directly in Notion. Share this URL in your welcome email, your contract, and anywhere you’d otherwise send clients to find project information.
For a pre-built starting point, the best free Notion templates for solopreneur productivity includes client portal templates worth cloning rather than building from scratch.
Building the Template Once, Using It Forever
Build your first client portal completely, then save it as a Notion template (click the three-dot menu on the page → Turn into template). For every new client, duplicate the template, rename it with the client’s name and project, and you have a pre-structured portal ready to populate in under ten minutes.
Option 2: Build an Airtable Client Portal (Free Tier)
Airtable’s approach to client portals is different from Notion’s — instead of a document-style page, you’re creating a database view that the client accesses. This works better for freelancers who manage many projects with consistent structured data and want clients to be able to submit requests or feedback via form rather than commenting on a document.
The Airtable Portal Structure
Build two tables:
- Projects table: one record per project with fields for status, current deliverable, next milestone, client action required (yes/no), and a long-text field for notes
- Deliverables table: one record per deliverable with attachment field, version number, delivery date, and feedback field — linked to the Projects table
Create a Gallery or Grid view filtered to the client’s project. Share this view via Airtable’s shared view link — clients see only their project records, not your full base.
For client feedback, create a Form view linked to the Deliverables table: clients fill in the form to submit feedback on a specific deliverable, which creates a new record automatically. No email required, feedback goes directly to your database.
The free tier’s 1,000 record limit covers most freelancers comfortably — a freelancer with 10 active projects and 20 deliverables each uses 200 records, well within free tier limits.
Option 3: Use ClickUp’s Free Guest Access
If you’re already using ClickUp for task management, its guest access feature turns your existing project setup into a client portal without building anything separate. Invite clients as free guests to their specific project Space — they see the task board, project status, and any documents you’ve attached, with view-only or limited edit access depending on your preference.
The advantage: your internal workflow and client view are the same thing, meaning project status is always current without manually updating a separate portal. The disadvantage: clients see your task-level project management structure, which may expose more internal workflow detail than you want to share — or may look more complicated than a clean Notion page for clients who aren’t accustomed to project management tools.
Best for: freelancers who already use ClickUp and whose clients are comfortable with structured interfaces.
Free Client Portal Tools Compared
| Tool | Setup Time | Client Login Required | Feedback Method | Best For | Free Tier Limit |
|---|---|---|---|---|---|
| Notion | 1–2 hours | No | Inline comments | Document-heavy projects | Unlimited pages |
| Airtable | 2–3 hours | No (shared view) | Form submissions | Data-heavy, many projects | 1,000 records/base |
| ClickUp | 30 minutes | Yes (guest account) | Task comments | Existing ClickUp users | 5 guests free |
| Google Sites | 2–3 hours | No | Embedded form | G Suite users | Unlimited |
Automating Your Client Portal Updates
A client portal is only as useful as it is current. If you build a portal and then forget to update it, clients will check it once, find outdated information, and go back to emailing you. The fix is automating as many portal updates as possible so the status reflects reality without requiring manual effort.
Automations worth setting up:
- New deliverable → portal updated: When you mark a task as complete in your PM tool, a Zapier automation updates the deliverable status in your Notion portal or Airtable base automatically
- Client feedback submitted → task created: When a client submits feedback via Airtable form or Notion comment, a Zap creates a revision task in your ClickUp or Notion task list automatically
- Project stage change → client notification: When a project moves to a new stage, an automated email notifies the client that the portal has been updated with new information to review
- Weekly status update → automatic: A scheduled Make.com scenario pulls the current project status from your PM tool and posts an update to the client’s portal page every Monday morning without manual input
For the full automation stack that connects your client portal to your broader workflow, our guide on automating recurring tasks in your small business covers these trigger-action patterns in detail. And for the complete client onboarding workflow — from intake form through portal creation — our client onboarding automation guide shows how the portal fits into the full onboarding sequence.
- A functional free client portal has five elements: project status, client action items, deliverables, a feedback mechanism, and key project reference information — nothing more, nothing less.
- Notion’s free tier is the fastest path to a polished client portal — shared via public link, no client login required, built once as a template and duplicated for every subsequent client.
- Build the portal as a template first, then duplicate it for each new client — the first build takes 1–2 hours; every subsequent portal takes under 10 minutes.
- Automating portal updates (deliverable status changes, project stage changes, client feedback notifications) is what keeps the portal accurate without adding manual maintenance overhead to your workflow.
- Introduce the portal at the start of every client relationship and explain explicitly that it replaces status update emails — client adoption depends on the onboarding moment, not the tool quality.
Frequently Asked Questions
Do clients need to create an account to use a Notion client portal?
No — Notion’s “Publish to web” sharing creates a public URL that anyone can access in a browser without signing up or logging in. Clients can view everything you’ve shared and leave comments on specific blocks without a Notion account. If you want clients to be able to edit certain parts of the portal (adding information to a form, for example), you can invite them as free Notion guests — but for view-only access with commenting, no account is required.
How many active client portals can I run on Notion’s free tier?
Notion’s free tier allows unlimited pages, so there’s no cap on the number of client portal pages you can create. The free tier limitation to watch for is guests — the free plan allows up to 10 guests (people you’ve explicitly invited to your workspace). If you’re using the public share link approach (Publish to web), this limit doesn’t apply — unlimited people can access publicly shared pages. Only switch to guest invites if you need clients to edit or create content directly in your workspace rather than just comment and view.
What’s the best way to handle file sharing inside a client portal?
For Notion portals, the most practical approach is to store files in Google Drive or Dropbox and embed links or Drive embeds directly in the portal page. Notion supports file uploads natively but the free tier limits uploads to 5MB per file — insufficient for design files, video, or large documents. Google Drive links embedded in Notion give you unlimited storage (within your Drive quota) with clean file presentation in the portal. For Airtable portals, the native attachment field handles file sharing well and is more practical for document-heavy workflows.
Should I build one portal template for all clients or customize per client type?
Start with one general template and customize it per client as you learn what different client types actually use. After 5–10 portal builds, you’ll have a clear picture of which elements web design clients need (that copywriting clients don’t), which sections get ignored across all clients, and which additions would improve adoption. At that point, building two to three specialized templates (one for retainer clients, one for project-based clients, one for consulting clients) is worth the effort. Don’t pre-build specialized templates before you have the data — build one solid general template first.
How do I get clients to actually use the portal instead of emailing me?
Three things make the difference: introduce it during onboarding (not after the relationship is established), make it easier to use than email (one click to the URL, clearly labeled sections, obvious where to leave feedback), and reinforce it consistently for the first few weeks. When a client emails you something the portal is designed to handle — a status question, feedback on a deliverable — reply with the information and add: “I’ve updated the portal to reflect this — you can check status there anytime at [link].” After three or four of these redirects, most clients shift their behavior naturally. The minority who never adopt the portal despite consistent reinforcement are typically not worth the friction of forcing the issue — handle them via email and protect your portal habit with clients who do engage with it.
Related Reading
- Best AI Tools to Save Time at Work for Non-Tech Teams via BizRunBook
- Klaviyo vs Mailchimp for Small Ecommerce Stores 2026 via SaaSSleuth