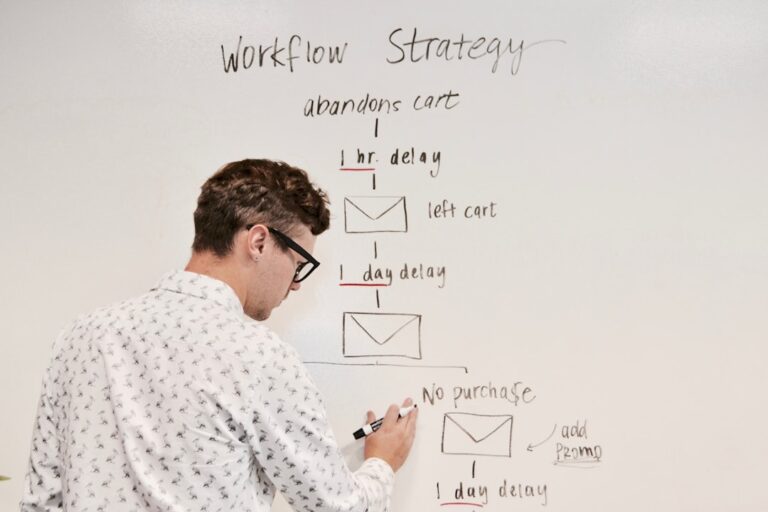
How to Automate Client Offboarding for Service Businesses
Disclosure: We may earn a commission when you purchase through links on this site, at no extra cost to you. How we make money.
Most service businesses have a solid onboarding process and a chaotic offboarding one. The onboarding is structured because it has to be — you need information from the client to start the work. Offboarding gets treated like a formality: send the final files, wish them well, move on. But that casual exit costs you more than you realize. You miss feedback that would improve your process. You forget to ask for a referral while the relationship is warm. You leave assets scattered across shared drives and email threads instead of in a tidy handoff package. And six months later, you’re trying to reconstruct the scope of work because nothing was properly archived.
Automation fixes all of this. A properly built offboarding workflow runs the moment a project moves to “complete” — no checklist to remember, no tasks that slip through — and handles everything from final invoice confirmation to testimonial requests to CRM archiving. Here’s how to build one.
What a Complete Client Offboarding Workflow Covers
Before building the automation, map what needs to happen at project close. A thorough offboarding workflow handles five distinct areas:
- Final deliverable handoff: All assets compiled in one location with a structured handoff document
- Final invoice confirmation: Automated check that the last invoice is paid before the project closes
- Feedback and satisfaction survey: Short survey sent while the experience is fresh — within 24 hours of completion
- Testimonial or referral request: Timed follow-up asking for a review or introduction when goodwill is highest
- CRM and project archiving: Client record updated to “past client” status, project space archived, access permissions revoked
Each of these is a manual task that can be forgotten. Automation turns the whole sequence into a single trigger.
The Trigger: Project Status as the Starting Point
Every offboarding automation starts with one event: a project moving to a “Complete” or “Delivered” status in your project management tool. That status change is your trigger. Everything else is downstream.
In ClickUp, set a native automation rule: when a task or project status changes to “Complete,” fire a webhook or trigger a Zapier Zap. In Notion, use a database property — when the “Status” field is updated to “Closed,” connect it to Zapier via the Notion integration to kick off the sequence. In Airtable, a record status change triggers the automation natively or through Make.
The key discipline: only one person marks a project complete — you. Don’t let the trigger fire automatically based on a date or a client action. The deliberate act of marking it done is your quality gate before the automated sequence runs.
Step 1: Automate the Final Asset Handoff
The deliverable handoff is the most substantive part of offboarding — and the easiest to rush. Automate the mechanics so your energy goes into the content of the handoff, not the logistics.
When your trigger fires, the first action in your Zapier or Make workflow should:
- Create a handoff document from a template in Notion or Google Docs, pre-filled with the client name, project name, and completion date from your CRM or project management database
- Generate a shared folder link (Google Drive, Dropbox, or Notion page) where final files are consolidated
- Send the client an email with the handoff document link, a brief summary of what was delivered, and login credentials or access instructions for any tools you set up on their behalf
The handoff document template should include: a summary of deliverables, file locations, login credentials (stored in a password manager they can access), any ongoing maintenance notes, and your contact information for questions after the engagement ends. Building this template once means every future handoff looks polished and professional with zero additional effort per client.
Step 2: Trigger the Feedback Survey Automatically
Feedback surveys sent three weeks after project completion get low response rates. Surveys sent within 24–48 hours of completion, while the experience is top of mind, get dramatically higher engagement — and more actionable responses.
Add a survey send step immediately after the handoff email in your workflow. Typeform and Tally both integrate with Zapier and Make. Your survey should be short — five questions maximum:
- How would you rate your overall experience? (1–10)
- What did we do especially well?
- What could we have done better?
- How likely are you to work with us again?
- Is there anyone in your network who might benefit from working with us?
That last question is your referral seed, embedded naturally in the feedback context. Connect the survey responses to your CRM automatically — Zapier can push completed survey responses into an Airtable record or a ClickUp task so you have a searchable archive of client feedback without manually copying data.
Step 3: Automate the Testimonial Request
The testimonial request should never arrive in the same email as the feedback survey. The survey asks for candid feedback; the testimonial request asks for a public endorsement. Mixing them creates friction and reduces both response rates.
Use a time delay in your Zapier or Make sequence — 3 to 5 days after the handoff email is the sweet spot. By then, the client has reviewed their deliverables, the relationship is still warm, and the satisfaction from completing the project is intact. The automated email:
- References the specific project completed (use variables populated from your project database)
- Asks for a short testimonial — 2–3 sentences describing what they hired you for and what the outcome was
- Provides a direct link to your Google Business profile, LinkedIn recommendations, or a Typeform testimonial form
- Makes it easy to say no — “If now isn’t a good time, no worries at all” keeps the relationship intact even if they decline
Store received testimonials automatically. If you use a Typeform, connect it via Zapier to a Notion database or Airtable table where you track testimonials by client, industry, and use case. When you need a specific testimonial for a proposal, you search the database rather than digging through emails.
Step 4: Archive the Client Record and Revoke Access
The final step in the workflow is housekeeping — but it’s important. Clients who retain access to internal workspaces after project completion are a security and privacy risk. Projects that stay in “Active” status clutter your dashboard and skew your workload visibility.
Automate the archive step:
- Update client status in your CRM from “Active” to “Past Client” — this filters them out of active pipeline views while keeping their record for future reference
- Archive the project space in ClickUp, Notion, or Airtable so it’s out of your active workspace but searchable if needed
- Revoke guest access to any shared workspace pages (this step typically requires manual action in Notion and ClickUp — add it as an automated task assigned to you rather than a fully automated action)
- Log the project in your completed work database with revenue, duration, deliverable type, and client industry — data that helps you understand which client types are most profitable over time
For ClickUp users, Build a Freelancer CRM in ClickUp With Smart Automation (2026) covers the full CRM architecture including past-client tagging and project archiving. For Notion-based setups, Best Notion Databases for Freelancers (Projects + Clients) walks through the database structure that makes archiving and retrieval fast.
Tool Options for Building the Offboarding Workflow
| Tool | Role in Offboarding | Best For | Free Plan |
|---|---|---|---|
| Zapier | Trigger + multi-step sequence automation | Linear workflows with common app integrations | 100 tasks/mo |
| Make | Complex multi-step workflows with branching logic | Conditional offboarding paths (e.g. retainer vs. project) | 1,000 ops/mo |
| ClickUp | Trigger source + native task automation | Solopreneurs already using ClickUp for PM | Yes (limited automations) |
| Notion + Zapier | Document handoff + status trigger | Document-heavy services with Notion workspaces | Notion free + Zapier free tier |
| Airtable | CRM record update + survey response storage | Retainer clients with recurring offboarding cycles | Yes (limited automations) |
| Typeform / Tally | Feedback + testimonial collection forms | Both — Tally is free, Typeform is more polished | Tally: fully free |
The 90-Day Re-Engagement Automation
Offboarding isn’t just a close — it’s the start of a nurture sequence for future work. Add one more automated step to your workflow: a 90-day delayed email that checks in with past clients.
This email doesn’t pitch anything. It’s a short, genuinely personal-feeling message — “It’s been a few months since we wrapped [Project Name]. Wanted to see how things are going and whether there’s anything new on your plate I could help with.” Use Zapier’s delay step or Make’s scheduler to fire this exactly 90 days after project completion, populated with the client name and project reference from your database.
Past clients are your warmest leads. This single automated touchpoint, sent consistently to every past client, generates a steady stream of return business and referrals without any ongoing effort. Set it once and it runs indefinitely as you close projects.
If you want to build a more complete re-engagement system, the same automation principles that apply to onboarding apply here. How to Automate Client Onboarding as a Freelancer covers the full lifecycle approach — and the offboarding workflow described here plugs in as the closing chapter of that same system.
Connecting Offboarding to Your Broader Automation Stack
Client offboarding doesn’t exist in isolation — it’s the downstream end of a workflow that starts at lead capture and runs through the entire engagement. The more your tools are connected, the more your offboarding automation can draw on existing data rather than requiring manual input at project close.
If you’re using Airtable as your client database, the offboarding trigger can pull client name, project type, start date, revenue, and contact email directly from the record — no copy-pasting, no risk of the wrong email going to the wrong client. For patterns on connecting your full automation stack, Best Workflow Automation Tools for Solopreneurs (2026) covers the full tool ecosystem and how the pieces fit together.
- A complete client offboarding workflow covers five areas: asset handoff, invoice confirmation, feedback survey, testimonial request, and CRM archiving — all triggered by a single project status change
- Gate the offboarding trigger with a “final invoice confirmed paid” check so the sequence never fires while the client still owes you money
- Send the feedback survey within 24–48 hours of project completion and the testimonial request 3–5 days later — never combine them in one email
- Add a 90-day re-engagement email to the end of the sequence to convert past clients into repeat business without any ongoing manual effort
- Build separate offboarding sequences for retainer clients and one-time project clients using Make’s conditional branching — the two client types need meaningfully different exit experiences
Frequently Asked Questions
What’s the minimum viable offboarding automation for a solopreneur just starting out?
Start with just two automated steps: a project completion email with the final files link, and a feedback survey sent 24 hours later. Connect your project tool to Zapier using the free tier and a Tally form (free). This two-step automation handles the most failure-prone parts of manual offboarding — forgetting to send the survey and burying the handoff in a long email thread — without any subscription cost. Add the testimonial request and 90-day re-engagement steps once the basic workflow is running reliably.
How do I handle offboarding for clients I want to keep as ongoing retainers?
Build a branch in your workflow that checks whether the client has a “Retainer Renewal” flag in your CRM. If yes, the offboarding sequence routes to a renewal proposal email instead of a closing summary — sent automatically when the project reaches its final milestone, not after it’s marked complete. Tools like Make handle this conditional routing cleanly. The renewal proposal email includes a brief summary of what you delivered, a suggested next engagement scope, and a Calendly link to book a renewal call — all automated, all personalized with project-specific variables.
Should I automate the exit call scheduling or keep it manual?
For higher-ticket engagements (typically $3,000+), schedule an exit call rather than relying entirely on a survey. Automate the scheduling by including a Calendly link in your handoff email — “I’d love to do a quick 20-minute wrap-up call to walk you through the deliverables and answer any final questions.” The booking is automated; the call itself is personal. For lower-ticket or shorter projects, a survey handles the feedback loop without requiring calendar time from either side.
What should I do with negative survey feedback?
Set up a conditional step in your Zapier or Make workflow: if the satisfaction rating is below 7 out of 10, skip the testimonial request email entirely and instead create a task in your project management tool assigned to you — flagged urgent — to follow up personally within 24 hours. Don’t automate the response to a dissatisfied client; automate the alert that tells you a human response is needed. This distinction matters for client retention and your reputation.
How do I make sure automated offboarding emails don’t feel robotic?
Personalization variables do most of the work: client first name, project name, specific deliverables completed. Beyond variables, write the email templates in your actual voice — the same way you’d write a one-to-one email. Avoid corporate phrasing like “Please find attached” or “As per our agreement.” Short paragraphs, a genuine tone, and a specific project reference make an automated email feel personal to most readers. If you have a brand voice document, feed it to your AI writing tool when drafting the templates — consistency across all automated touchpoints signals professionalism, not automation.